
Today, I will show you how and why you should set up a custom noreply address for git commits on GitHub and other git hosting providers with Cloudflare mail routing. Git displays the author’s email address on every commit.
As a result, many of those emails are harvested by spammers.
Platform provided Noreply Address:
GitHub and other git hosting providers give you the ability to use a noreply email address from them for commits. For example, GitHub provides something like this: “[email protected]”. All emails sent to that address will bounce, as they should for a noreply address.
Learn more about private emails from Github and Gitlab
Why use a Custom Noreply Address?
- Portability: With a custom noreply address, you’re not tied to any specific platform, making it easier to transition between git hosting providers or collaborate with teams using different platforms.
- Verification Challenges: You can’t use your GitHub noreply address on other platforms because you can’t verify it. Almost all providers require you to verify an author email address to display the commit on your profile.
- Commit signing: If you sign your commits with GPG, do you want an email as a UID over which you don’t have control?
It is also easier to verify your signature because you can set up WKD, allowing anyone to import your key withgpg --locate-key EMAIL. - Consistency: A custom noreply address allows you to maintain consistency, especially if you use multiple git hosting providers.
How to set it up?
If you own a domain and use Cloudflare as your DNS provider, it’s a matter of a few clicks and it is free, so let’s dive in:
First, go to your Cloudflare dashboard and select the domain you want to use. Then click on “Email” -> “Email Routing” -> “Get Started.”
You can find the documentation about Cloudflare email routing here.
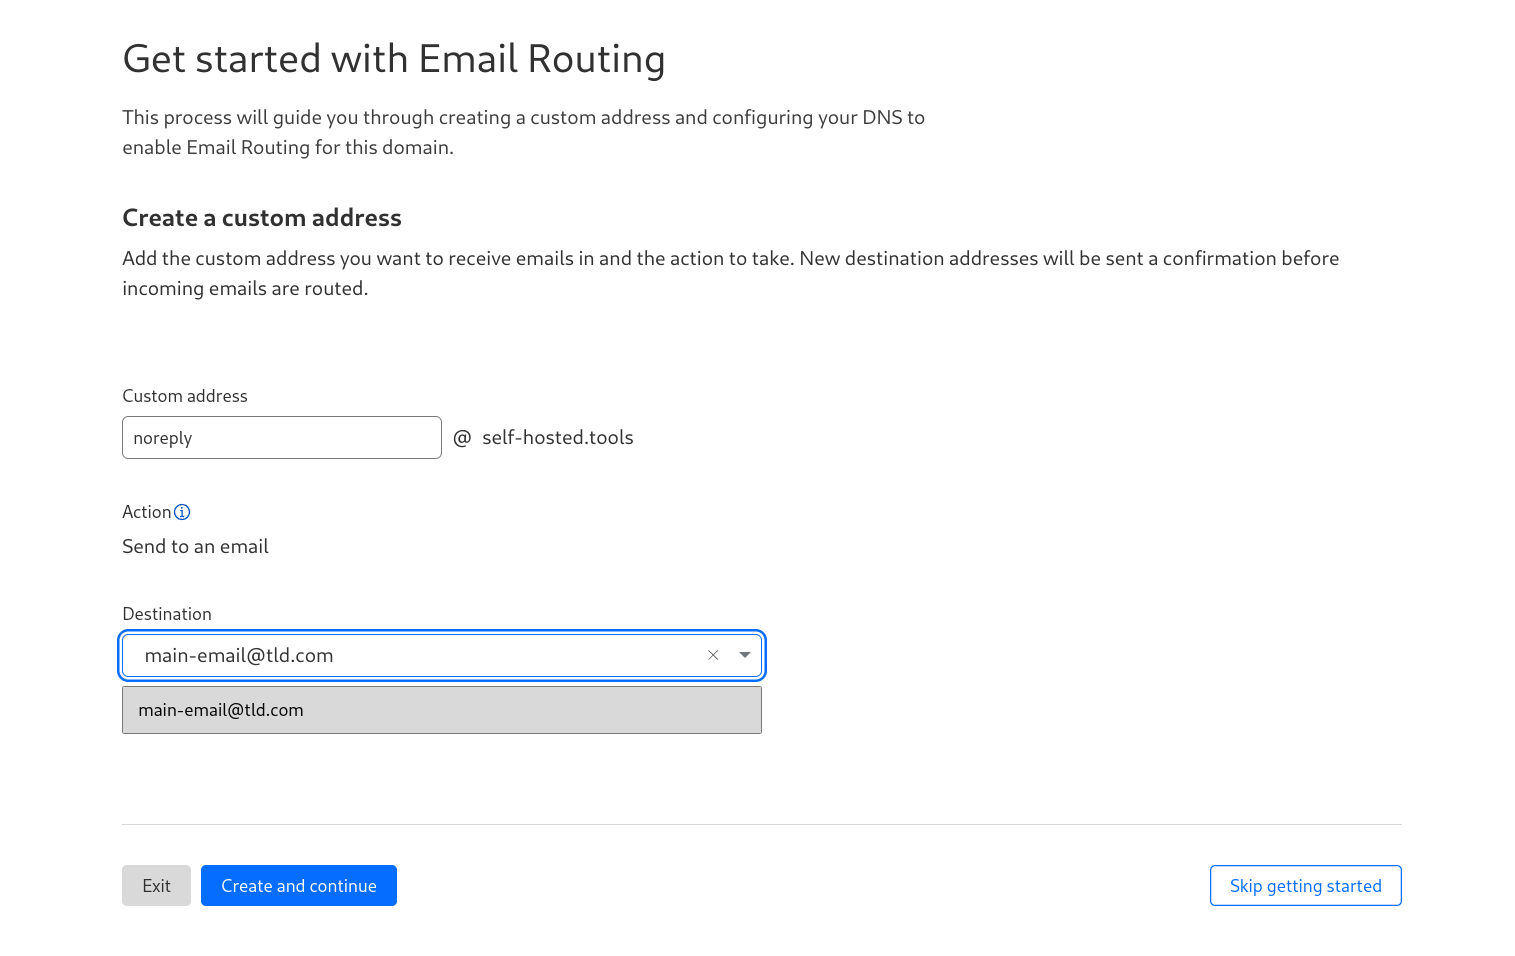
If you don’t plan on using your apex domain (your domain name without a subdomain) for email, you can set up [email protected] (or anything you want) on the next screen:
If you plan to use your apex domain with another mail provider, you can click on “Skip getting started” and proceed to “Settings” on the next screen.
Select “Add Subdomain” and input the subdomain you want to use.
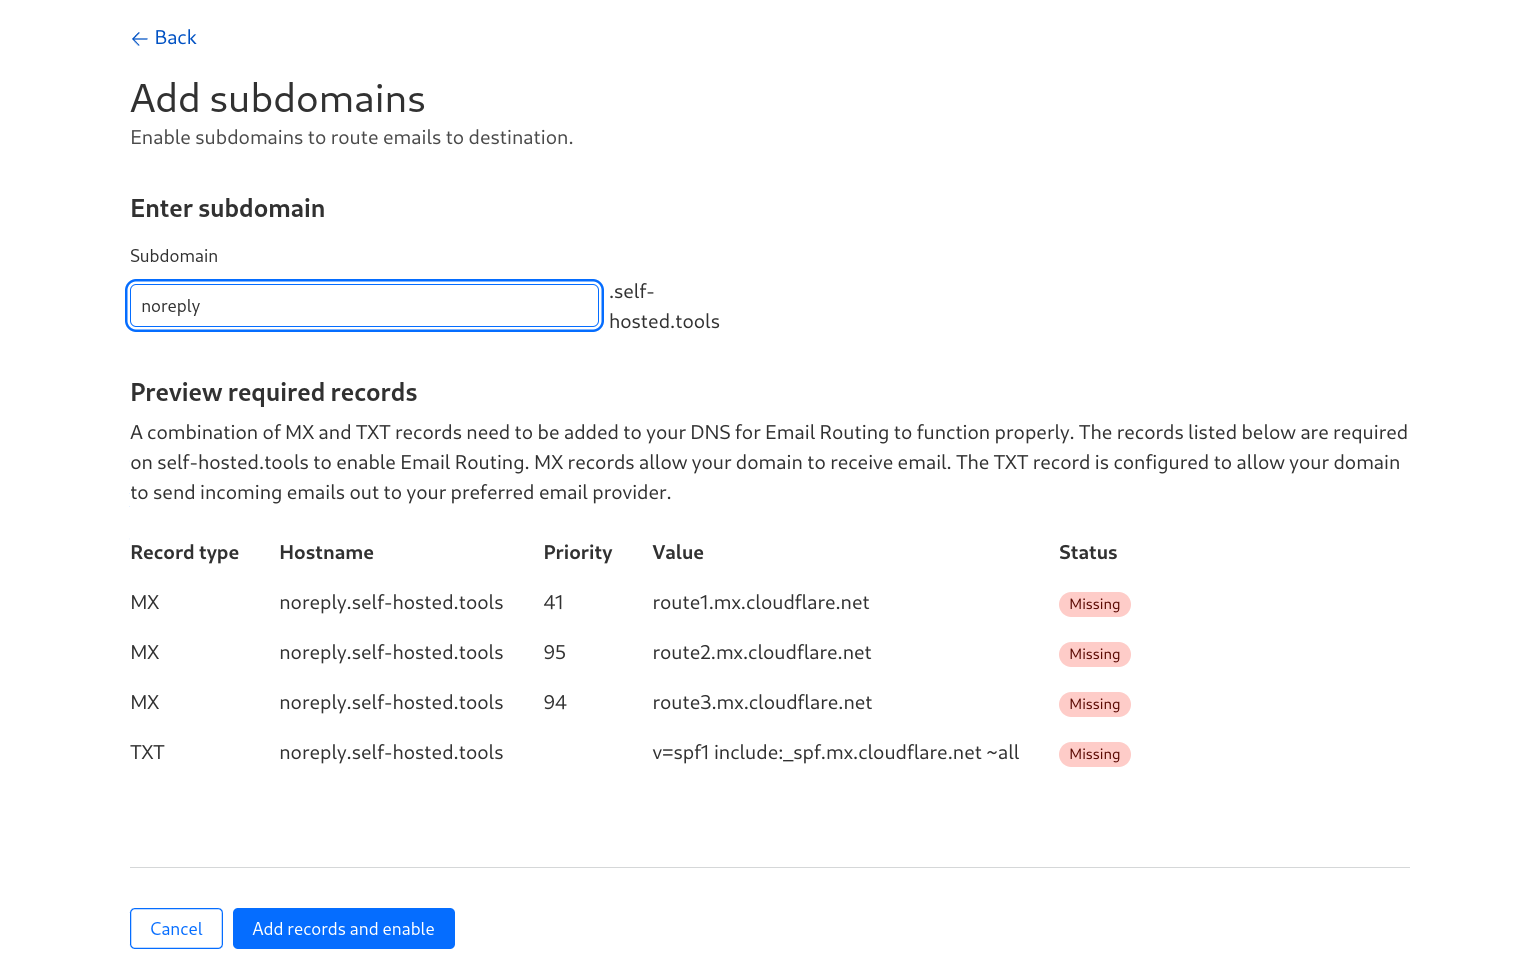
You can use any subdomain you prefer. Click on “Add records and enable,” and you are nearly good to go.
For my personal domain, I chose “git.example.com” because I prefer [email protected] and because I have a few use cases for the noreply subdomain already in mind.
Using the git subdomain could potentially avoid confusion if I decide to use the noreply subdomain in the future.
Click on “Destination Address” and add a real email that will be used to receive the confirmation email.
After that, go to “Routing Rules” and create a custom email address, set the action to “Send to an email” and select your verified mail that you added in the previous step.

Now you are ready to add the new email on your git hosting provider like Github as an additional mail address.
If you are using Github, keep “Keep my email addresses private” checked, but uncheck “Block command line pushes that expose my email”:

Now set your new email in your local git config:
| |
Your locally created commits will now have “[email protected]” as the author name. However, commits, merges, and other changes made through the GitHub web interface will have your “[email protected]” email as the commit author, otherwise you would expose your primary email address.
After you have verified the mail on your git provider, you can change the action for the custom address in Cloudflare from “send to an email” to “Drop”.
If you need to verify the email on a new git provider, simply route the mails to your normal inbox, verify them, and then set the action again to “Drop”
Send a custom reject message with Cloudflare Workers
Optionally, you can use a worker to send a custom reject message when someone sends an email to your git noreply address.
Cloudflare offers a generous free tier for up to 100,000 worker requests per day.
If you exceed 100000 worker requests per day and don’t use a paid plan, the requests to the worker will fail, but it appears you won’t be charged, see here and here (Please do your own research before activation!).
If you use a paid plan, you will be charged according to your plan.
To set this up:
- Click on “Email Routing” -> “Email Workers” -> “Create.”
- You can change the name or leave the autogenerated one.
- Select “Create my own” and then click “Create.”
Insert the following code into the next page and click “Save and deploy”.
Change “My rejection notice” to something you would like to send when someone sends an email to your git noreply address.
| |
I set mine to:
Your email has been rejected because the address you sent it to does not accept emails. This is likely because you obtained the address through automated scripts or internet scraping. Please refrain from contacting me using this address.
To activate it go back to “Routing rules” and edit the one you created before.
Change it from Action “Drop” to “Send to a worker” and select the worker you just created.
Cloudlfare also automatically created a URL where the worker is accessible, go back to the Tab “Email Workers”, click on the three dots and select “Manage Worker”.
Navigate to Tab “Settings” and select “Triggers”. Under Routes is a workers.dev URL where your worker gets triggered but shows only an error because nothing is configured for a webrequest.
Click on the three dots and select “Disable Route”.
The Email Trigger will still be active.
Now you can test it; you will get an email from the mailer daemon of your provider from which you sent it.
Your custom notice will be in the diagnostic code:
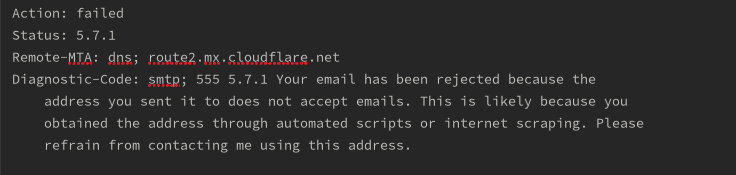
Photo by Roman Synkevych on Unsplash