
If you’re considering implementing Single Sign-On (SSO) for Open WebUI I’ve got you covered. Integrating it with ZITADEL is a great solution.
This guide will take you step-by-step through setting up SSO and managing roles, helping to boost both security and user experience.
Let’s get started on making your (and your users) experience as seamless as possible!
This guide will not cover on how to setup and configure ZITADEL or Open WebUI, I will focus on the oidc part.
Steps in ZITADEL
Create a new Project:

I would advise setting those three settings (you dont need to set the last two, but it gives you more control over what users can try to log in):
 Dont forget to click Save!
Create a new Application and select “WEB” as type:

Select Code as the authentication method:

Add https://ai.example.com/oauth/oidc/callback as the callback URL (change ai.example.com to your deployment URL):

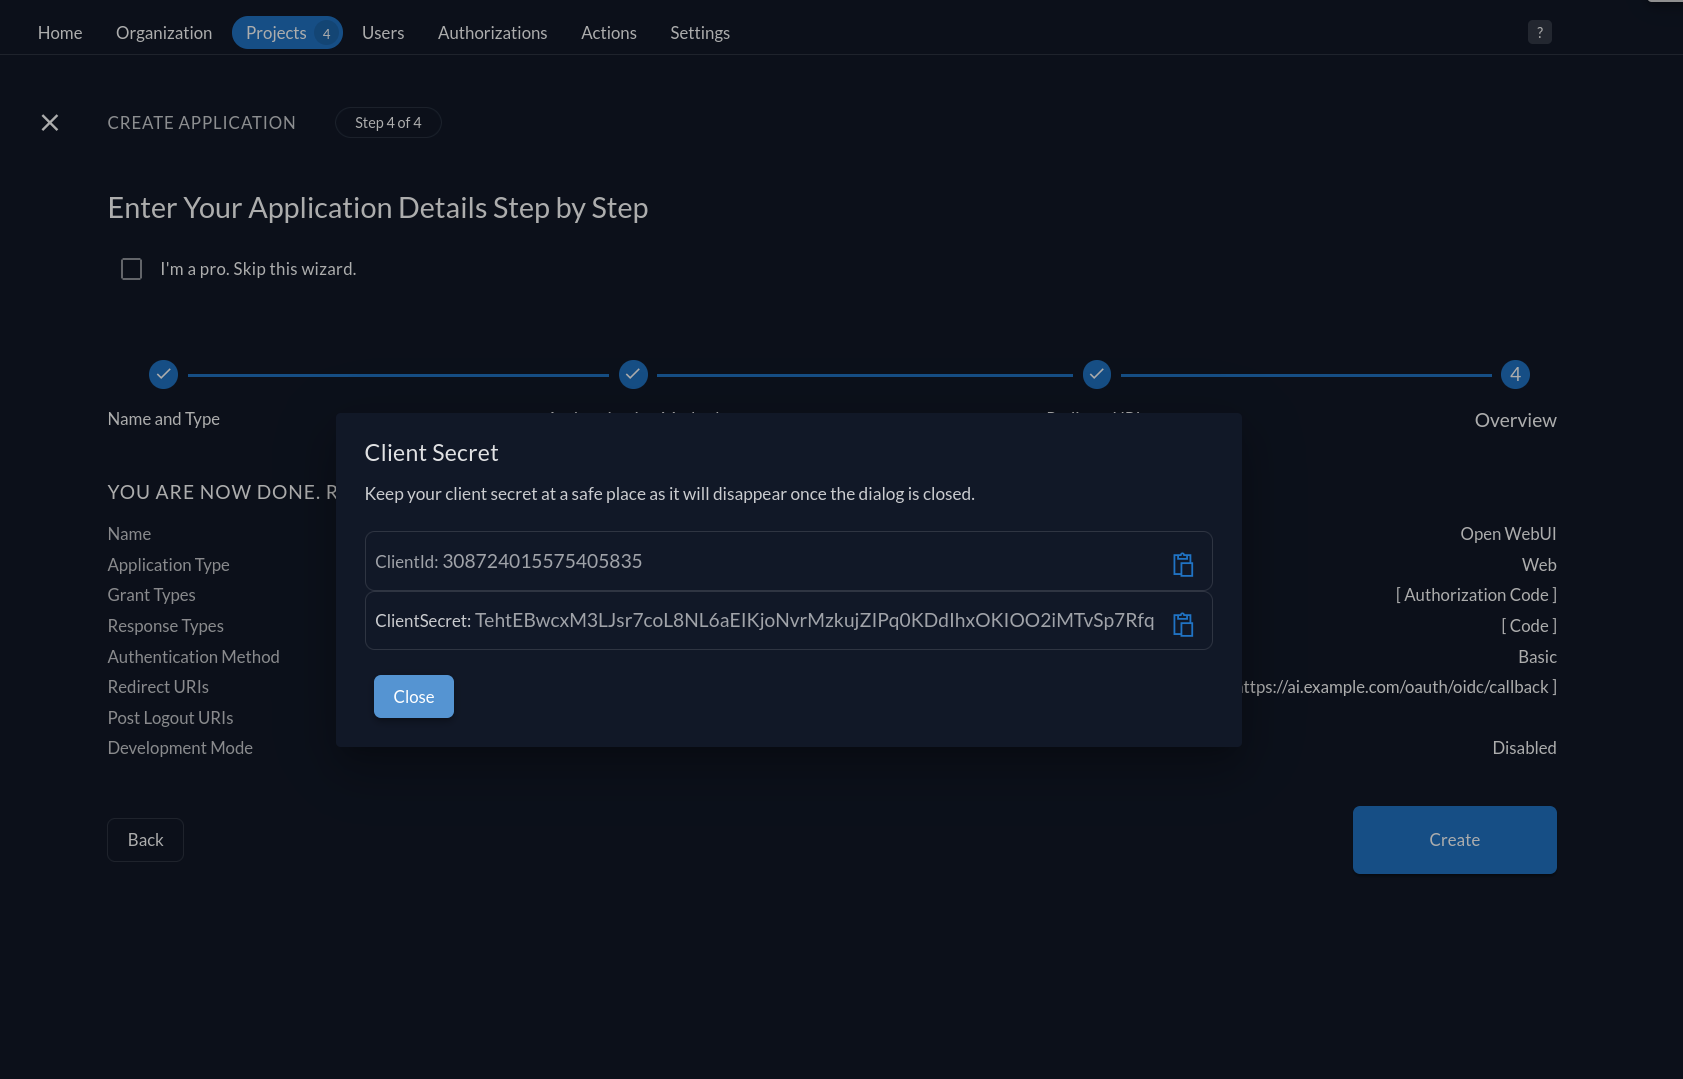
Control overview and click “Create”:

Copy your ClientId and ClientSecret and store them somewhere temporary:
Switch to Token Settings, check both options, and click Save:

Switch back to your Project and click on “Roles”.
Create an admin and user role:

Open WebUI expects the roles claim to be flat and won’t work with the standard ZITADEL Roles Claim.
We will fix that with a custom action that adds the roles of a user flat to the token.
Switch to the “Actions” Tab and create a new action:

Name: flatRolesClaim
(The name of the action and the name of the function in the javascript have to be the same)
Add the following content (adjusted from here):
| |
Add the following flow:
Last thing to do in Zitadel is to give a user access. Go to your project and give a user the needed authorizations:

Open WebUI
Add the following to your Open WebUI env variables:
| |
You can still have signups disabled for normal users; ZITADEL users can still log in (even if they have never logged in before).
If you have your default user role set to “pending”, ZITADEL users with the role “openwebui_user” or “admin” assigned will have their respective role inside Open WebUI and won’t be set to “pending”. If you did not set “Check authorization on Authentication” and a ZITADEL user without one of your roles logs in, the account will be in a pending state.
I hope this tutorial helped you set up SSO in Open WebUI.
If you do not already have central authentication in your homelab, just try it - it’s worth it 😉